


No products in the cart.
Bez kategorii
How to measure room acoustics
11
Dec
Dec
Basic explanation of room acoustics measurement
What is acoustical measurement?
Acoustical measurement involves testing sound intensity in the frequency and time domains. To conduct commercial measurements, advanced measurement systems are used, including expensive calibrated microphones that cost thousands of EUR. Such requirements are set by the standard, which regulates the requirements for both the microphone and the sound source with which the room is tigered.
Fortunately, you don’t need such advanced equipment to make a measurement at home. All you need is basically any condenser microphone and a sound interface with a suitable microphone input.
What is needed to take the measurement?
As mentioned above, all you need is a condenser microphone with omnidirectional characteristics, an audio interface and, of course, a computer with software. Is any condenser microphone suitable ? Yes and no. A good microphone should have maximally flat measurement characteristics, i.e. it should measure exactly the sound pressure level with which it is tigered. Unfortunately, cheap measurement microphones do not have a flat characteristic, and their distortion at the band extremes can reach several decibels. A good solution would be microphones with an attached calibration file, thanks to which the program corrects the measurement results taking into account the non-linear microphone characteristics.
What Microphone should be used?
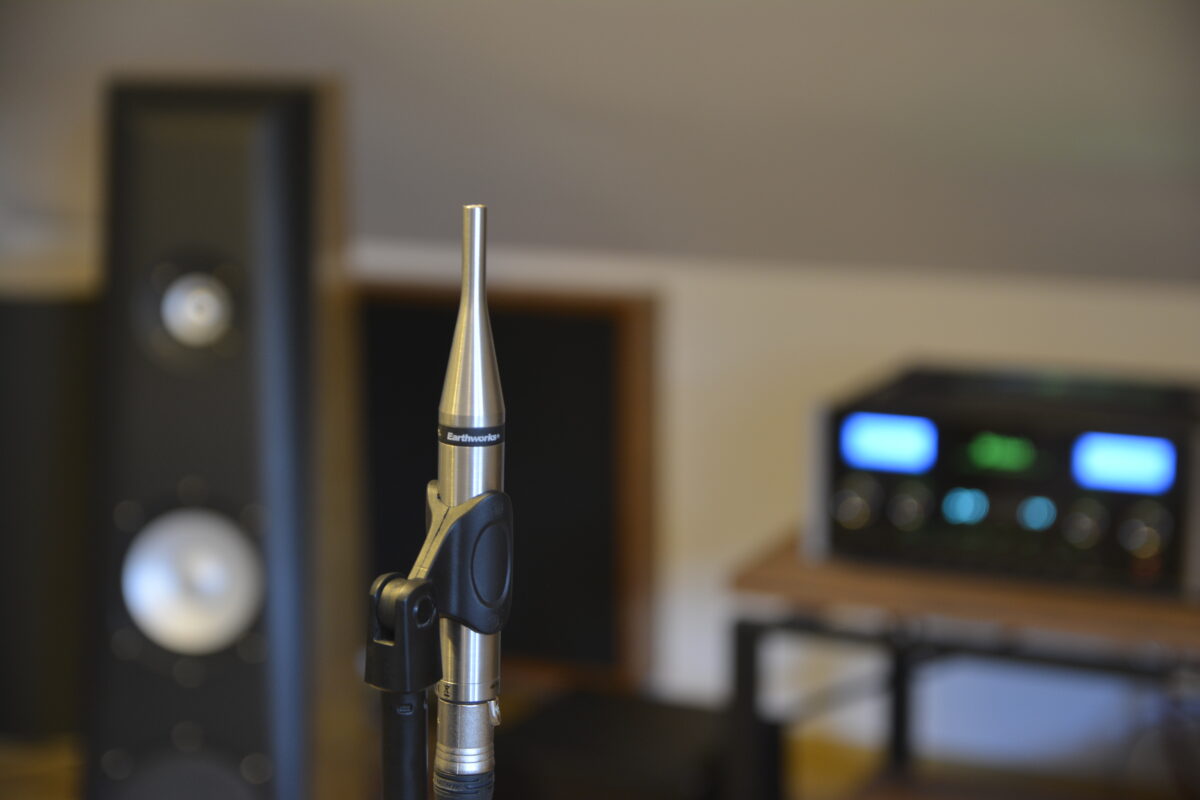
A basic and very popular condenser microphone with which it is possible to take amateur measurements is Behringer ECM 8000, which costs less than 50 EUR. Unfortunately, this microphone has a lot of distortion at the high-frequency extremes, and the manufacturer does not include a calibration file with it. Another noteworthy suggestion is Behringer B5. This microphone uses a much better quality cartridge, and a universal calibration file is available for it on the Internet. Its price is about 70 EUR, so it’s still very affordable. As for professional microphones, it seems that the best value for money at the moment is offered by Eathworks microphones. The manufacturer includes an individual calibration file for each micrpohone. Thanks to this, it is possible to take measurements with their help with the accuracy of +/-0.2dB result. Unfortunately, the disadvantage of these microphones is their price – the cheapest model is an expense of about EUR 500.
Sound card and software
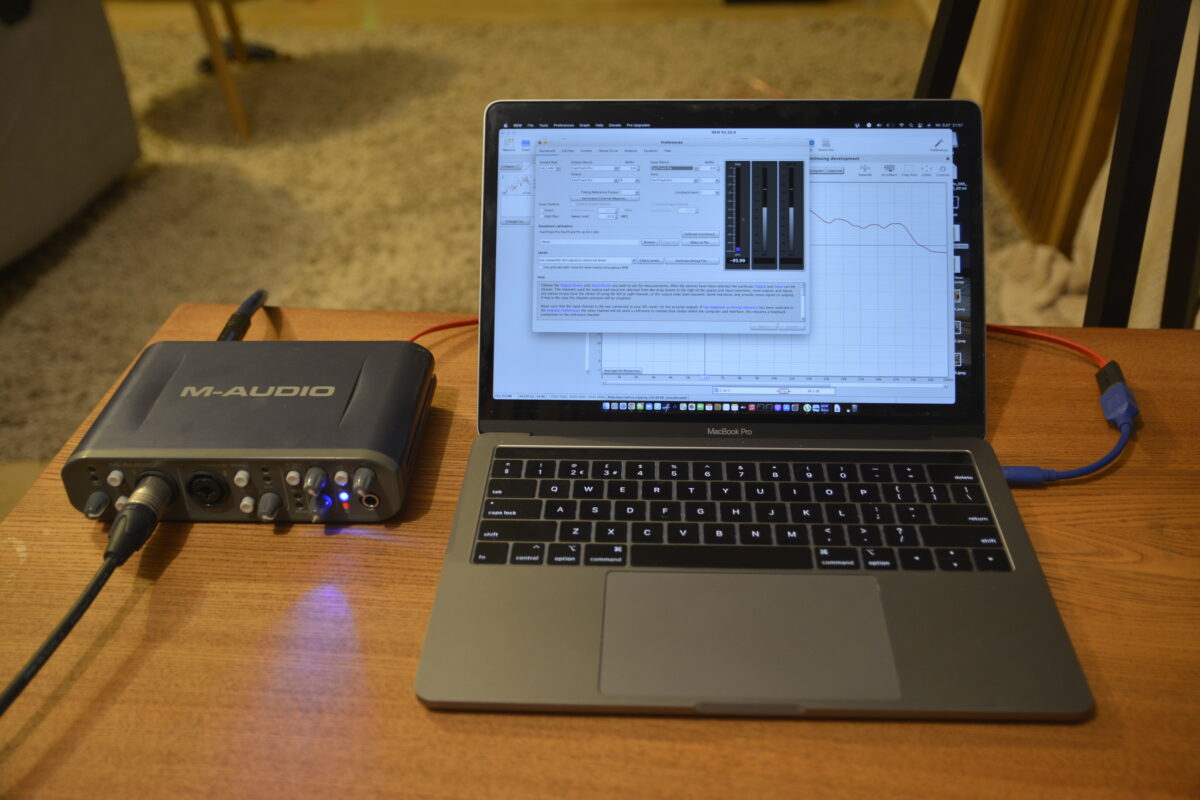
The audio interface used for measurement, should have XLR/TRS symmetrical inputs to connect the microphone. It must be equipped with the so-called 48V phantom voltage, as this is what most condenser microphones require. Among the popular interfaces available on the market, almost all of them will prove adequate – phantom power is in fact already a standard. Prices of such interfaces start at around EUR 50.
As for software, there are many tools on the market worthy of interest. Describing them all would require a separate thread, so I will focus on just one. Room Eq Wizard is probably the most popular program for acoustic measurements. This is for good reason – it is completely free of charge, has a user-friendly interface, on top of that it is extremely intuitive to use, and at the same time offers great possibilities for analysis and processing of results.
Preparation for measurement
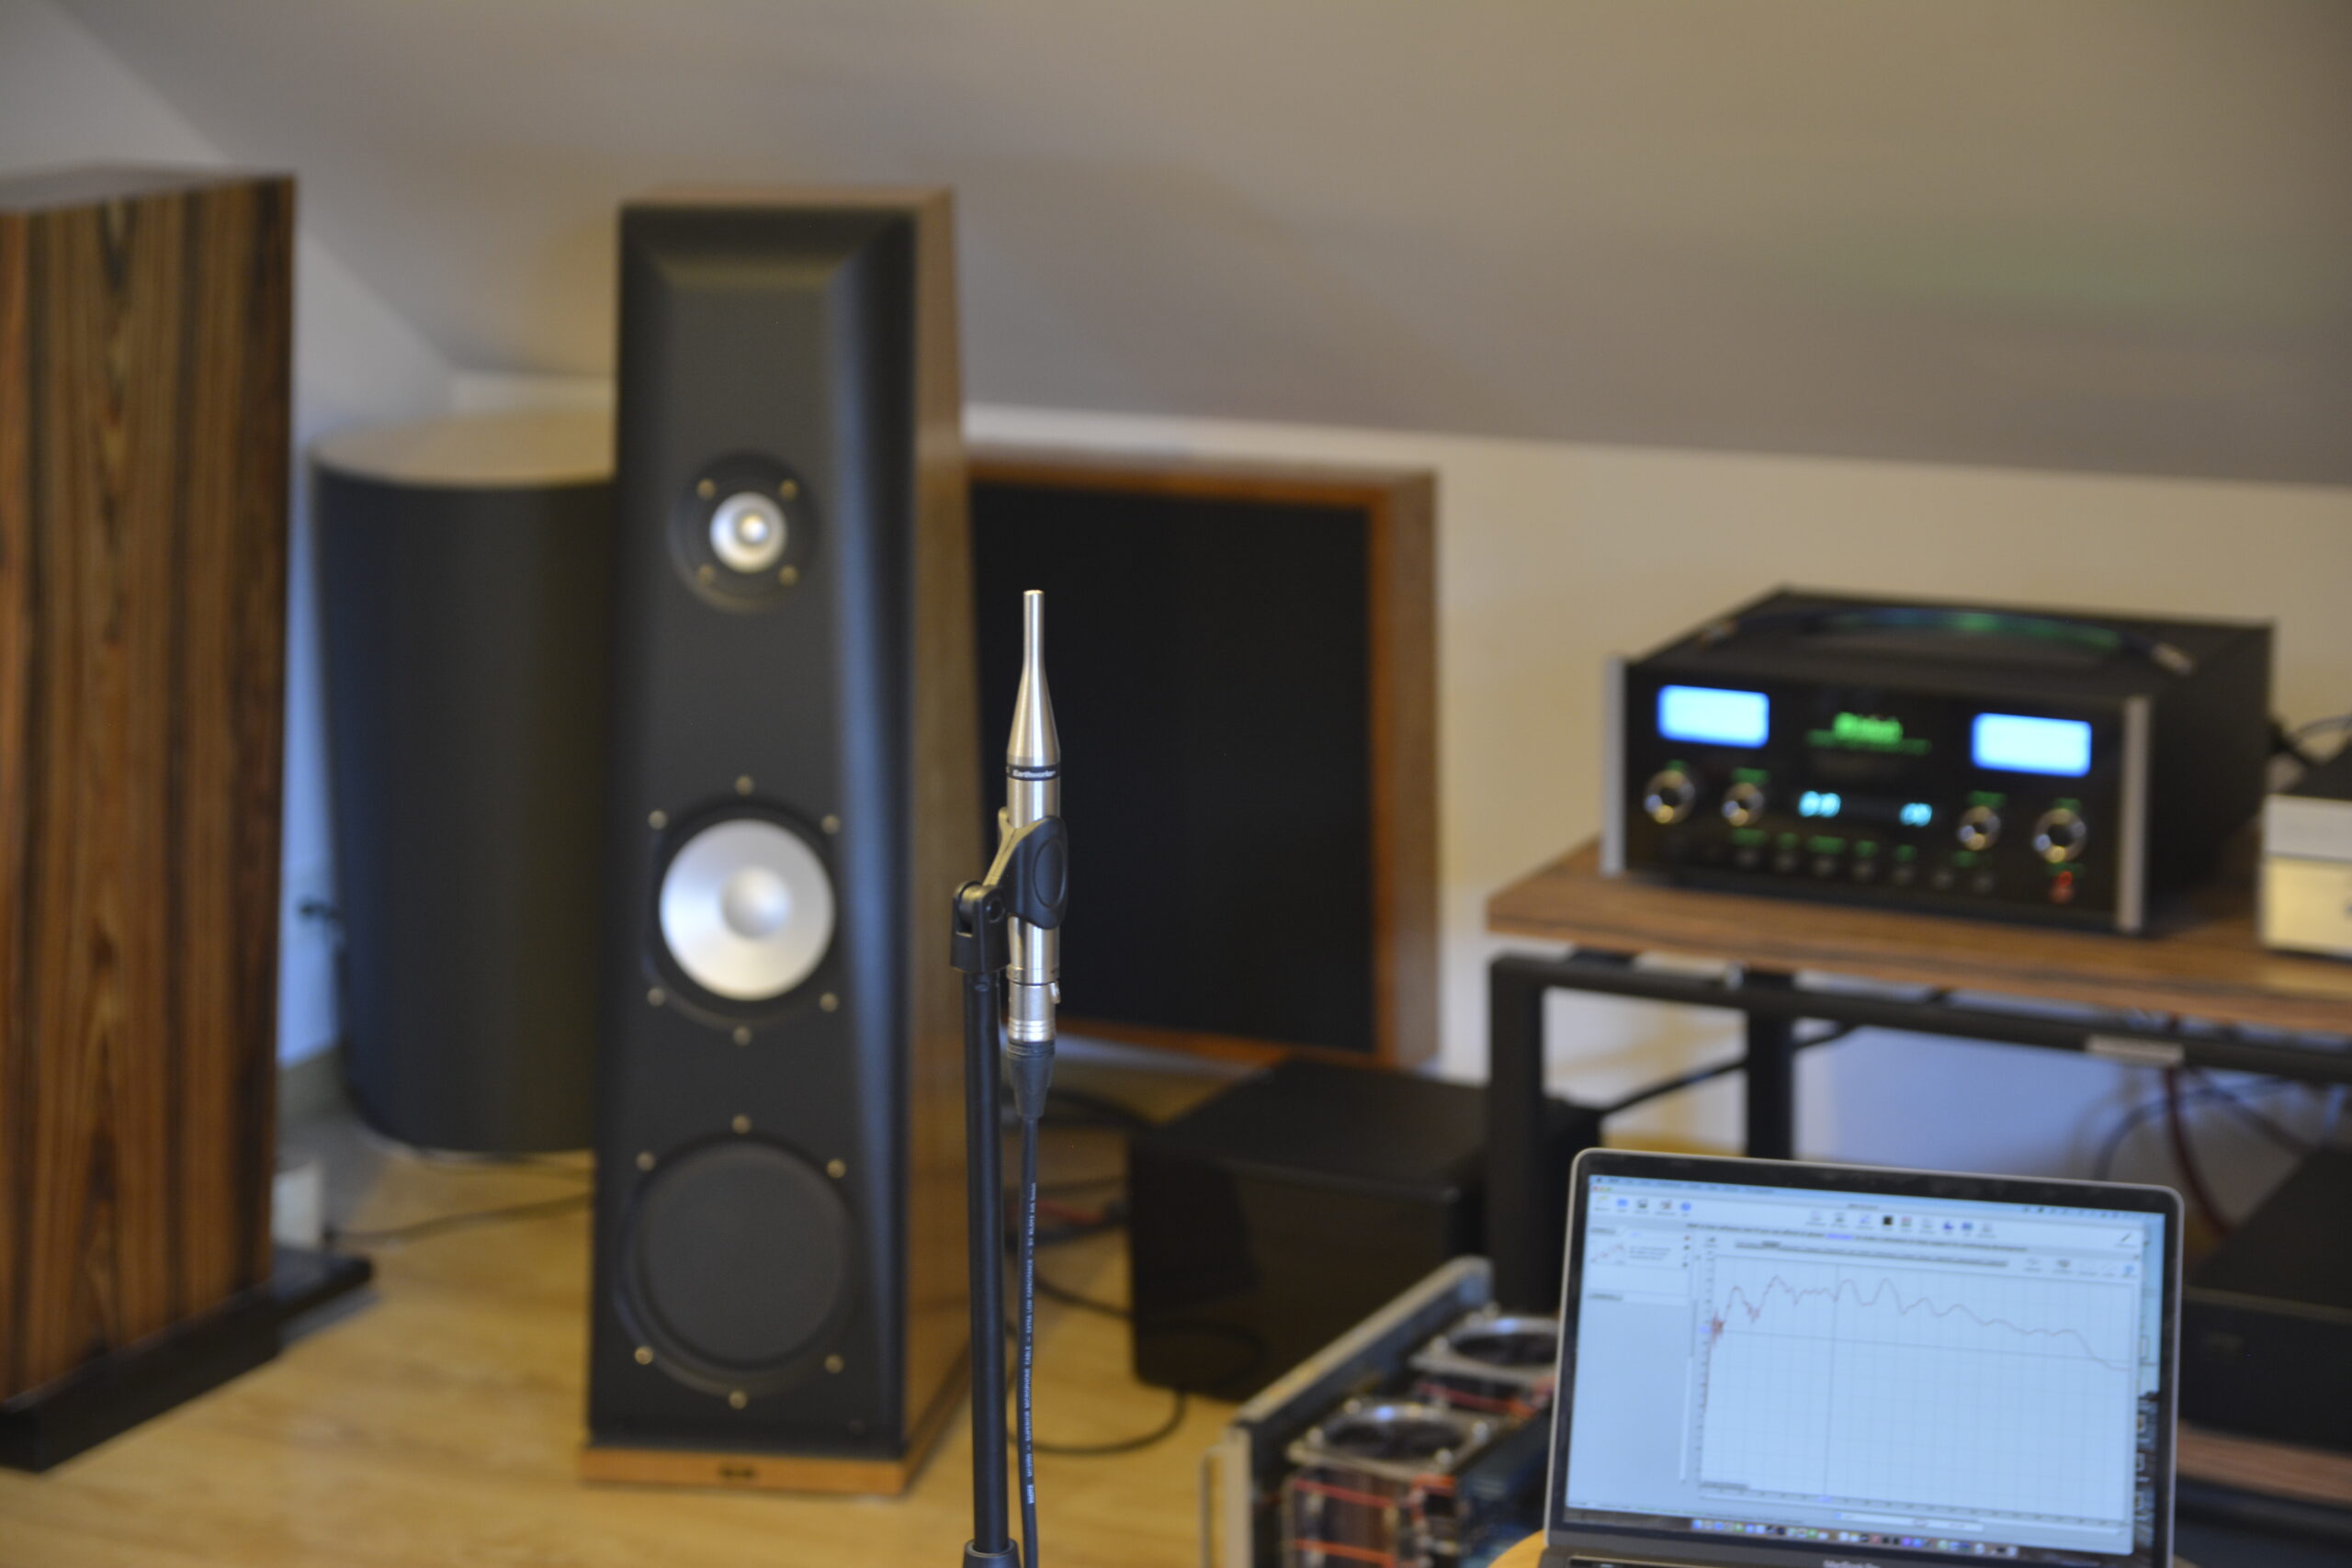
After connecting the interface, microphone and configuring the program, you can proceed to the actual measurement. For the first measurement, the microphone should be placed exactly at the listening spot at the same height as the ears. Such a measurement will provide us with information on the distribution of sound pressure exactly in the place where we listen to music. This is the place we are most interested in. Importantly, the microphone must be pointed vertically upward. Thanks to its omnidirectional characteristic, it will collect the signal from the entire room. It is a mistake to point the microphone toward the sound source.
The room should always be tigered by a signal emitted from only one sound source. Therefore, under home measurement conditions, one speaker should be disconnected.
Configuration and use of REW (Room EQ Wizard)
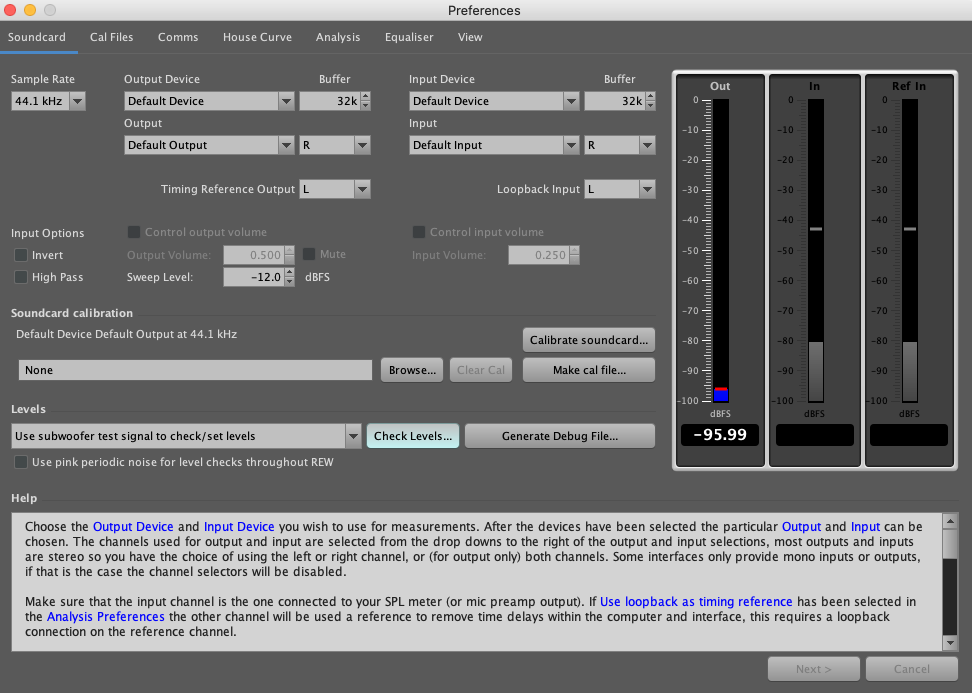
Configuration of Room Eq Wizard is very easy and comes down to the selection of signal output (Output Device) and microphone input (Input Device). You also need to adjust the output level and input sensitivity accordingly, so as to maintain an adequate dynamic range, which according to the program developer’s recommendations, should be -18dBFS. The program also allows to attach a calibration file, so it corrects the measurement results on the fly. Input and output levels are best adjusted manually, i.e. with controls on the interface. You can check the levels by pressing “Check levels” button. Once the levels are set, you can move on to making the actual measurements.
After clicking with Measure tab, we will be presented with a window where we can set such parameters as sampling frequency and trigger signal length. It is best to leave the default values here. The program tigers the room with a sine sweep of a pre-selected length. The signal length can be set in the range from 128k to 4M, i.e. from 3-95 seconds. The longer the signal, the higher the measurement resolution, but also the longer the time to wait for the result and the longer the microphone exposure to external noises. Optimal signal length, in my opinion, is 256k-512k. The measurement starts with a click on START button.
Interpretation of results
The program measures sound pressure distribution as a function of frequency (All SPL), reverberation time as a function of frequency (RT60), impulse response and distortion. We are only interested in the first two parameters, which will provide us with full information on the impact of the room’s acoustics on how we hear in the listening area. Measurement graphs may seem unreadable, so they should be smoothed and properly stretched. Proper smoothing and adjusting the start and end points of axes will allow to obtain graphs that are friendly to the eye and easy to interpret. Based on the SPL waveform and reverberation time data, we can generate a cascade chart, which presents such data in a very understandable form in a single image.
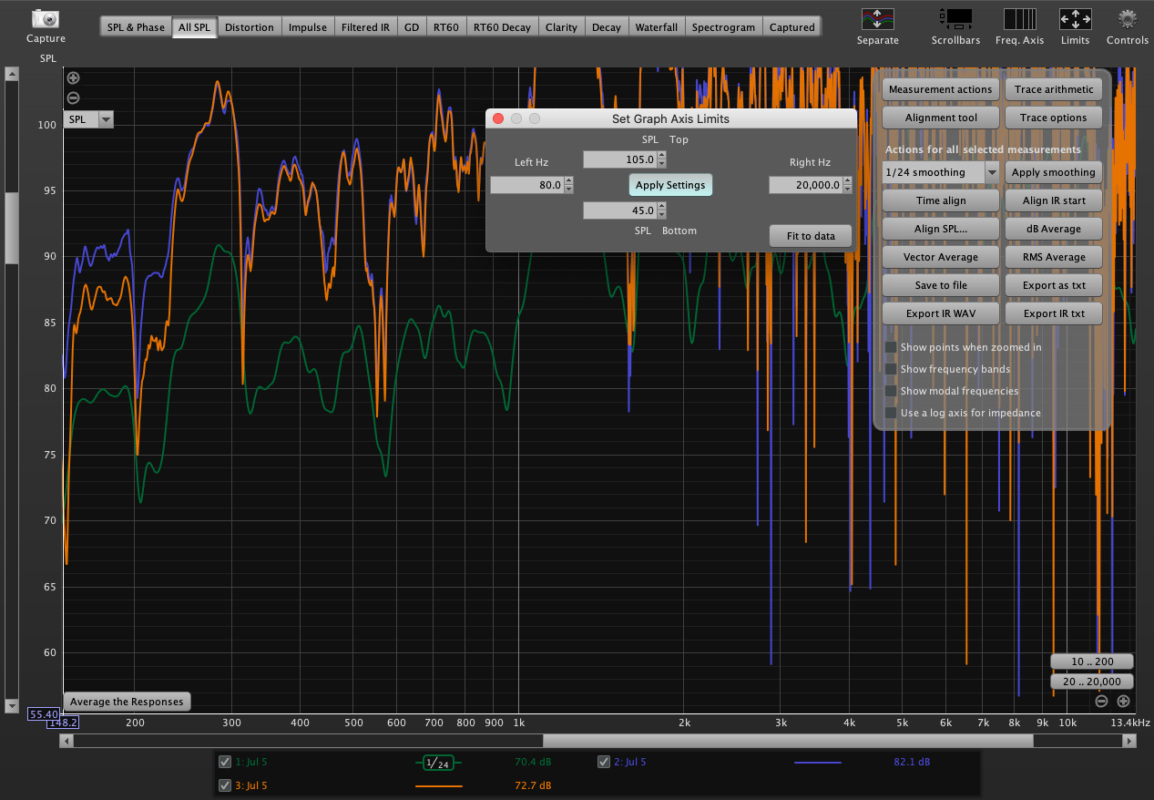
Those who have not been familiar with measurements before may be a bit surprised to see jagged graphs with numerous peaks and dips in the frequency characteristics. After all, in advertising materials, speaker manufacturers boast of nearly flat characteristics, and here such a thing? Peaks or dips in the graphs, reaching several and sometimes even a dozen decibels, are precisely the influence of room acoustics. Interference of sound waves bouncing off the walls causes numerous ripples in the frequency characteristics and has a huge, I would say, even crucial influence on what and how we hear. Blind pursuit of new wires and electronics won’t change anything until you deal with what’s most important – acoustics of the listening room.
Okay, so what does an acoustic measurement give us in a practical sense? Well, first of all, we will find out how long the reverberation is in the room and what the distribution of sound pressure is in the listening position. Thus we will know whether our listening position is optimal and whether the shortcomings in sound we experience are due to inadequately selected electronics or perhaps the room acoustics. We will also find out the resonant frequencies of the room, so that we can select appropriate bass traps to absorb these resonances. Based on the measurement, an experienced acoustician will be able to design the acoustic treatment accordingly and select the right solutions. And finally, and this is invaluable, such a measurement will give you a new awareness that the work of improving sound quality should begin not with the equipment, but with the appropriate room acoustics treatment.